Sometimes the littlest things take up the most room in your heart. – Winnie the Pooh

Before After

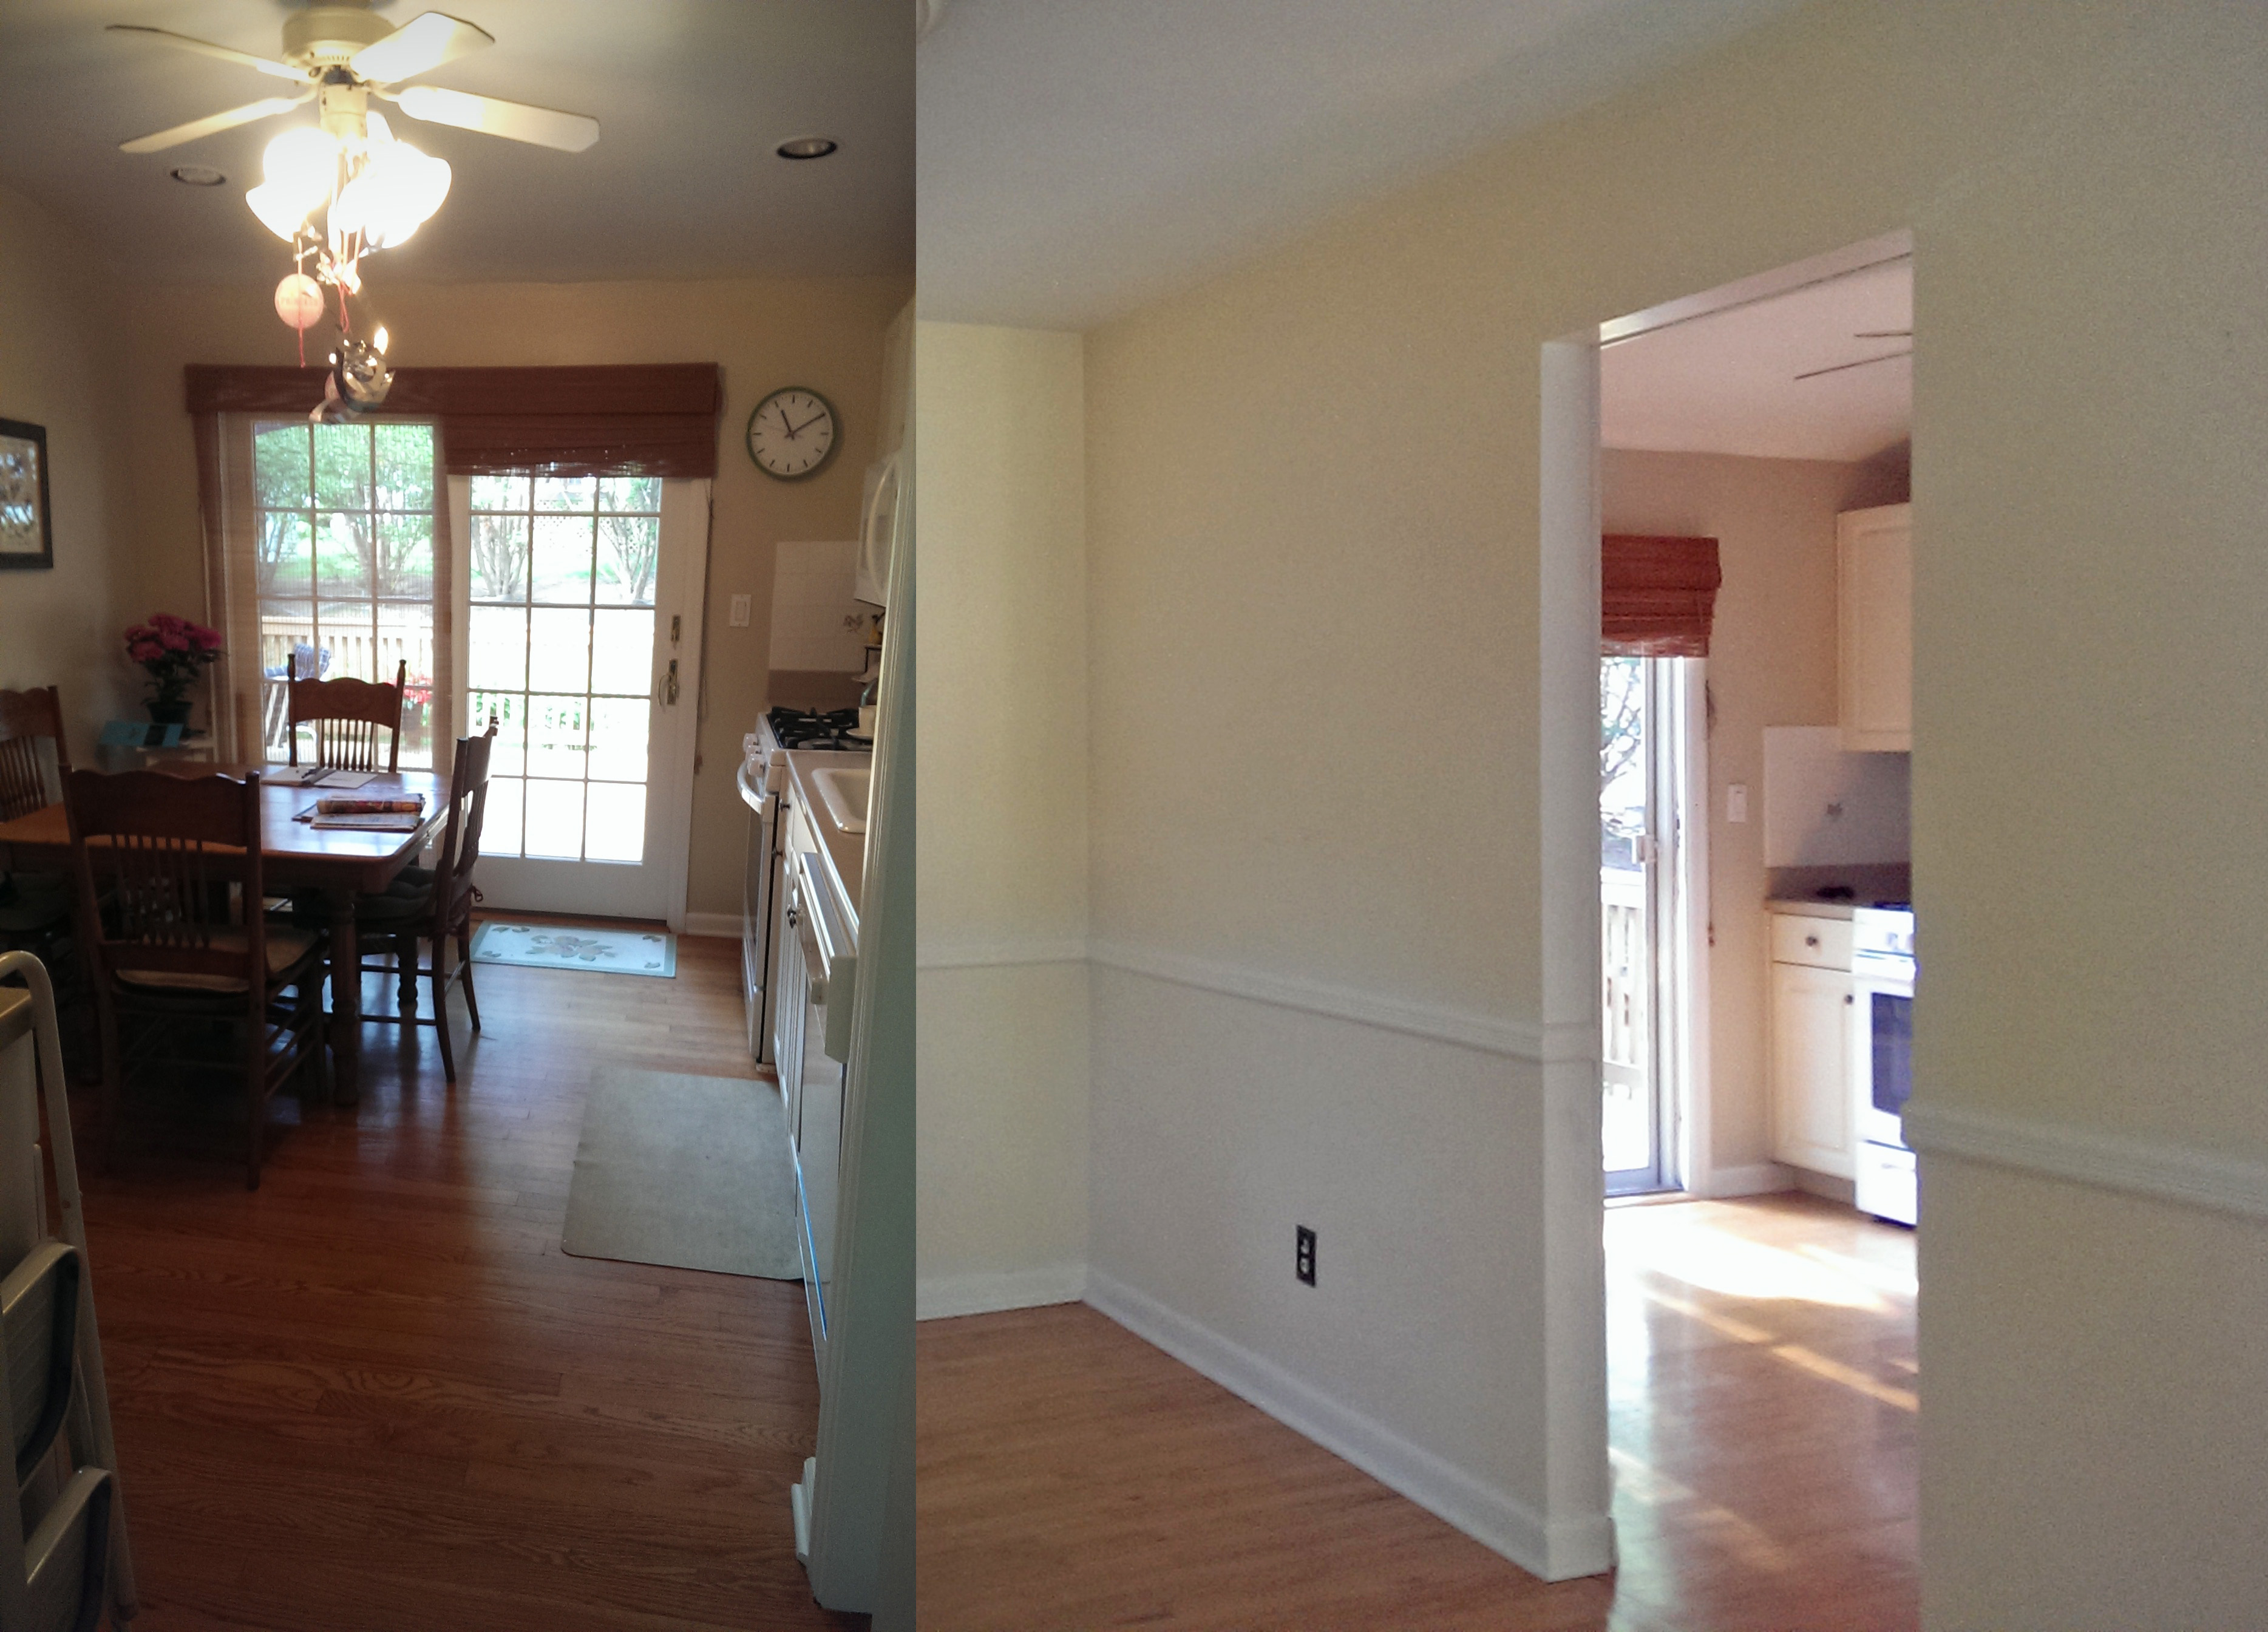
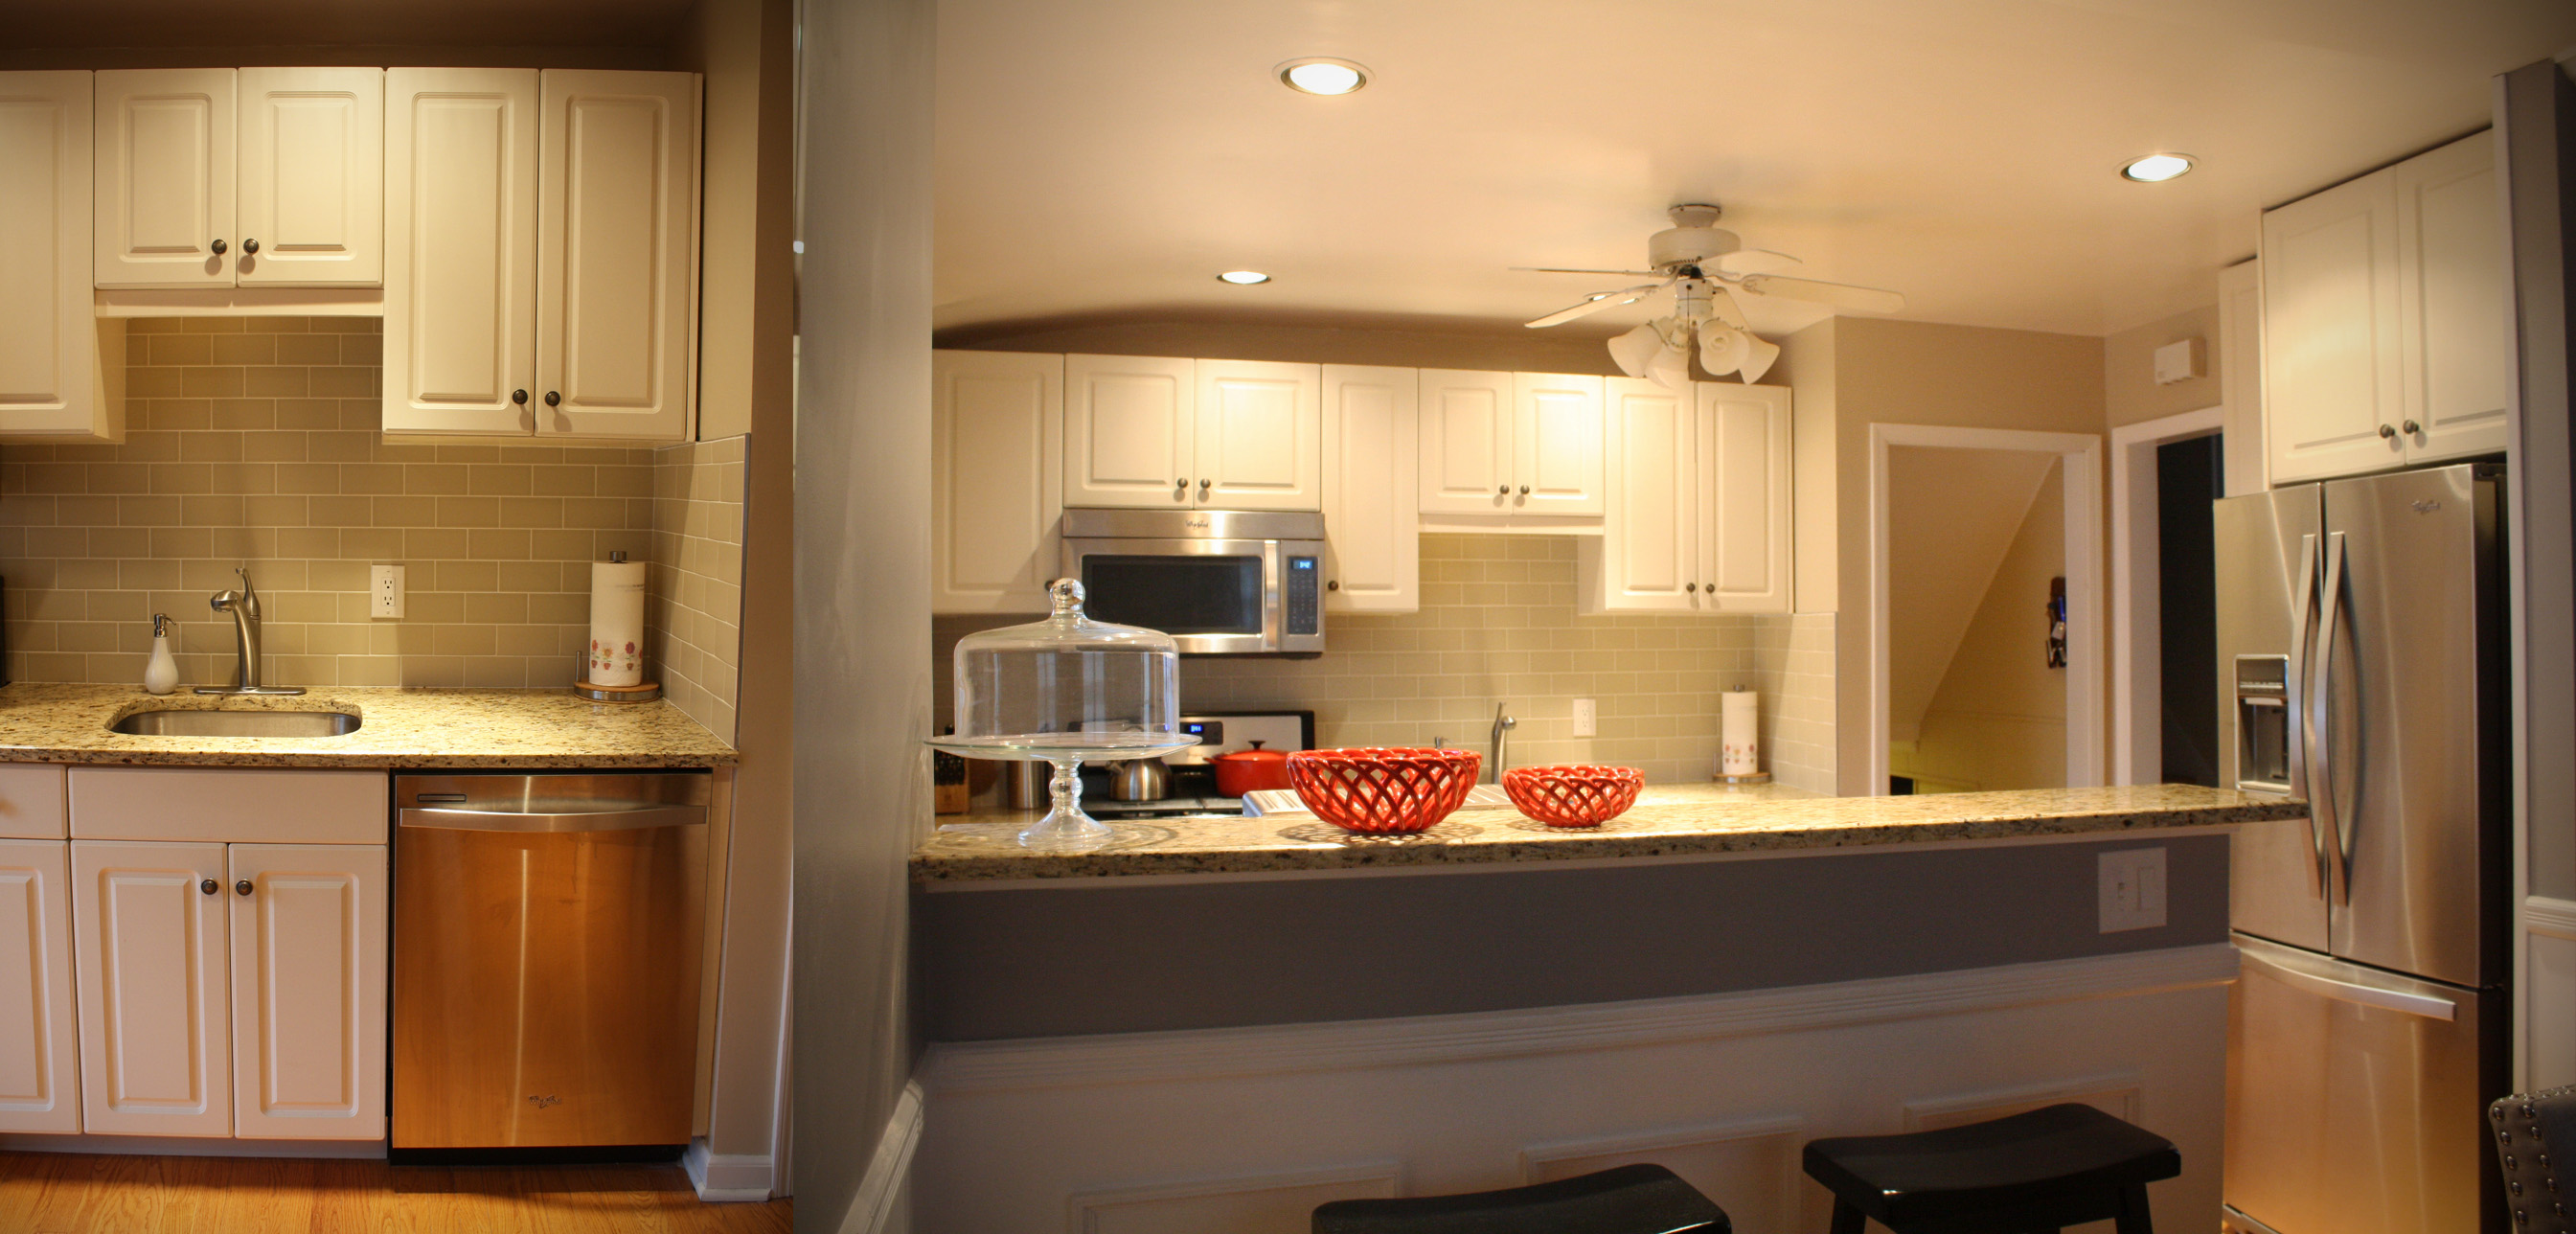
It’s been a whirlwind of preparation these last couple of months. Somehow, at the beginning of the 9 months, it feels like it will be forever until baby gets here, but since there’s not much prepping you can do until the 3rd trimester, it all comes at once. Baby Oliver will be here any day now, and we wanted his room ready and waiting for him. There wasn’t much renovation in here. Just paint and change in decor, which just goes to show how much that can do for a space!

Intro

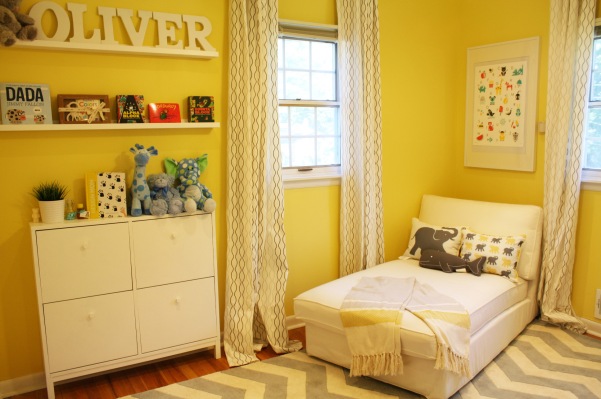
Believe it or not, almost everything you see above is Ikea, and also re-purposed from what I’ve had stored in the attic since the move. Look out for a high-low entry on this room, but for now, I can share that the picture-ledges turned book-shelf were originally birch veneer and hanging in our tiny 575 square foot apt to distract from the small space. We painted those, along with the shoe organizer turned diaper and wipes storage, a gloss white and are miraculously the same white as the rest of the furniture. This shoe organizer has literally been with me for 4 moves and has served many purposes, just never a shoe organizer. Being only 7 inches deep, it’s so useful as makeshift storage for those walls that aren’t quite deep enough for a dresser and items that don’t require being laid flat. Ikea has since discontinued this model, but they have something similar. Even the curtains/rods and picture frame are from Ikea. We just dressed it up with a print from Etsy like we dressed up the chaise with a few accessories from HomeGoods.

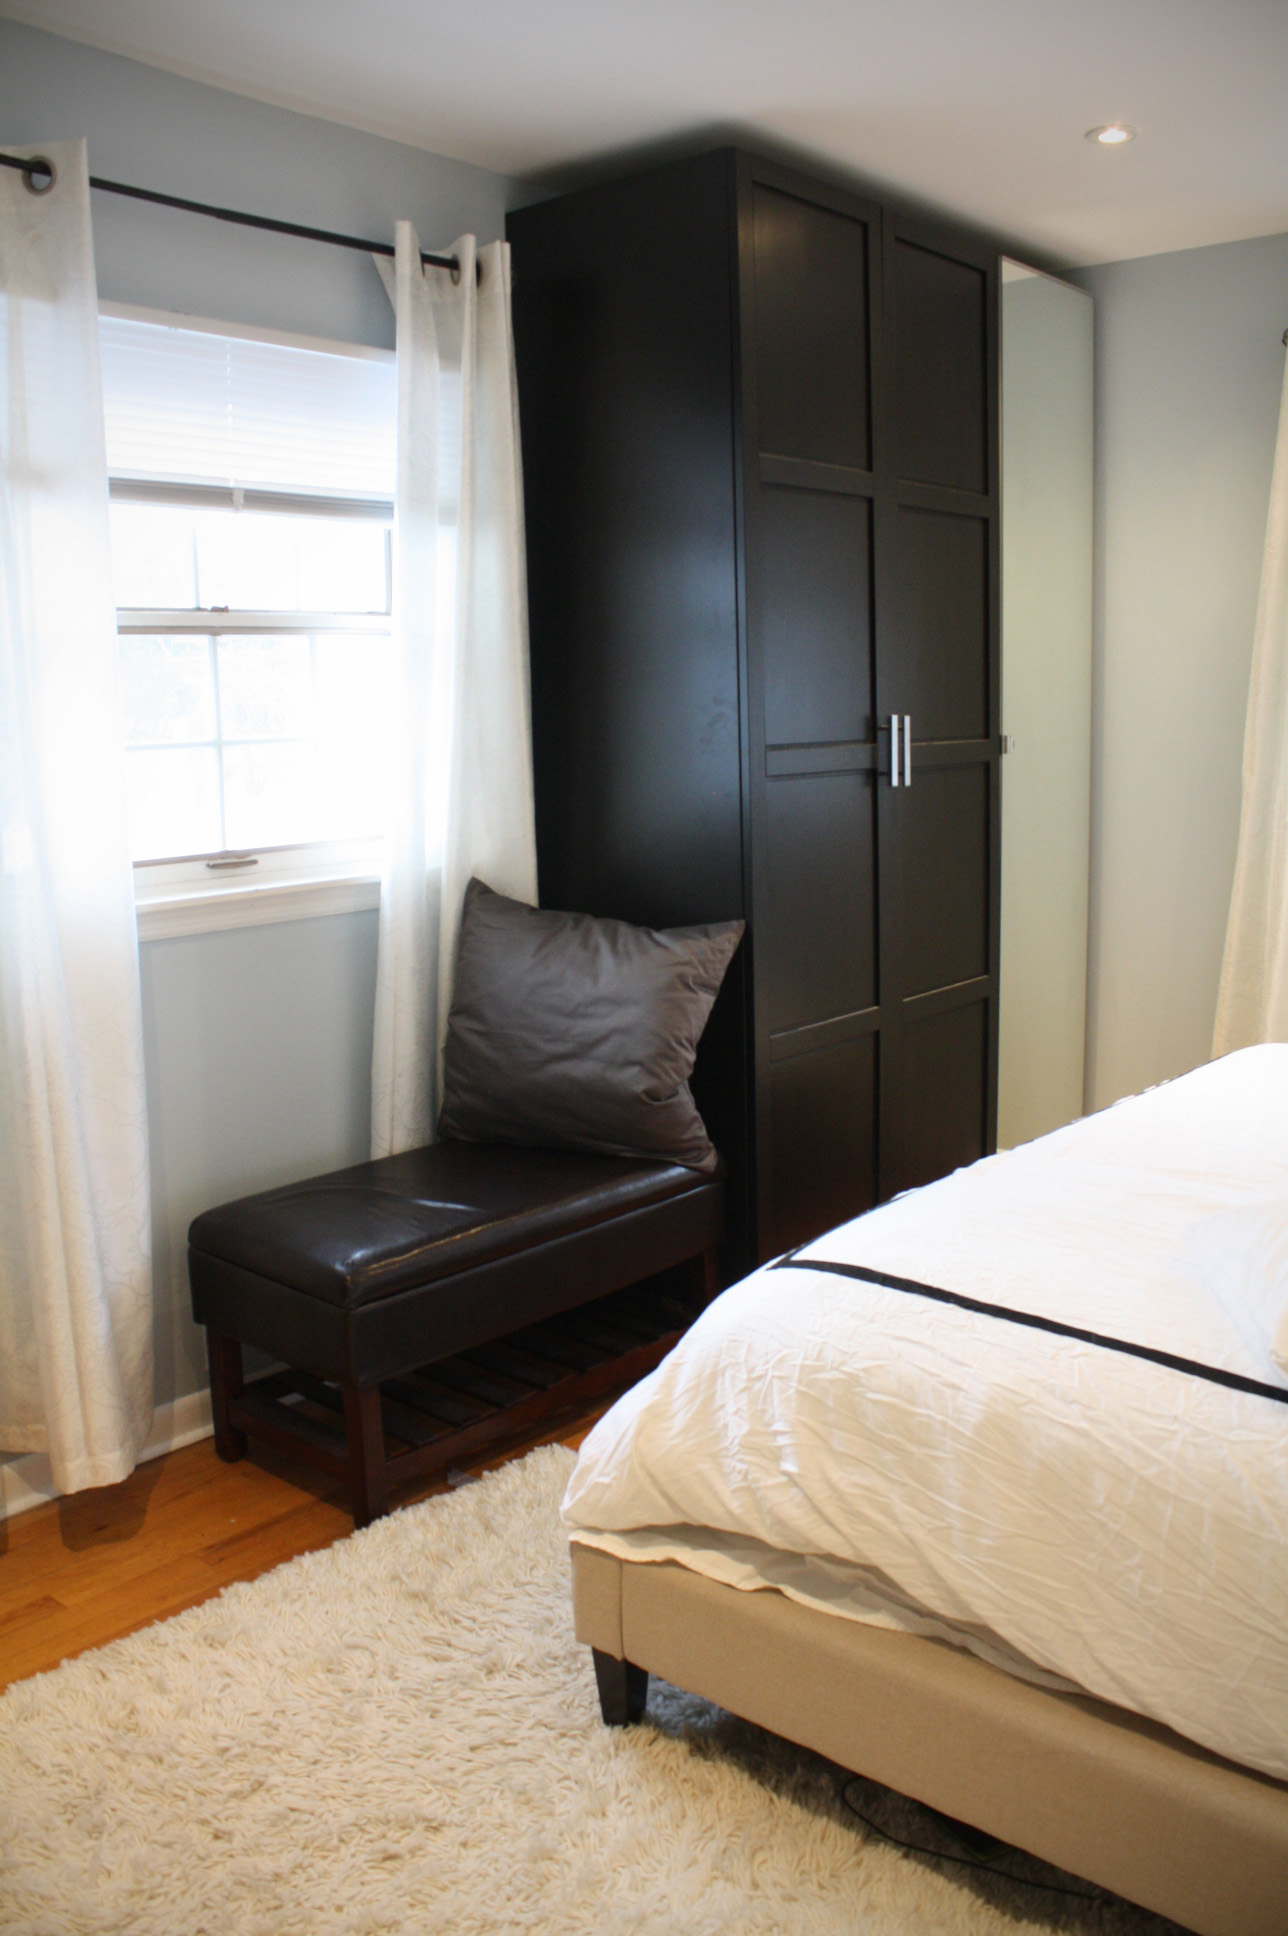
Since this room was originally the (guestless) guest-room, there was a long debate of whether to keep the full size bed in the room to make midnight feedings more bearable, and so that at least we both could try to sleep a little versus guaranteeing that neither of us would get any sleep at all. Once we started moving furniture around, it just didn’t seem realistic and I had an a-ha moment! The oversized Kivik chaise from the office was the dimensions of a twin bed and was barely seeing any usage. It fit perfectly and also saved me the trouble of looking for new bedding to match the room.

Crib_Changer

Since this room was originally a gender neutral nursery, i went with a white, yellow (applesauce, to be exactly), and gray color palette. Aside from the fact that I’ve never been huge on the “boys=blue, girls=pink” concept, I also figured this will put me in a better position if/when we need to re-use everything for any siblings.

I know this wall is looking a little bare, but it will eventually house photos from our maternity shoot, and our upcoming newborn shoot, Since i was wary of hanging photos (with nails & hooks!) above the crib, I actually managed to find a site which prints photos decals. So more to come on this.

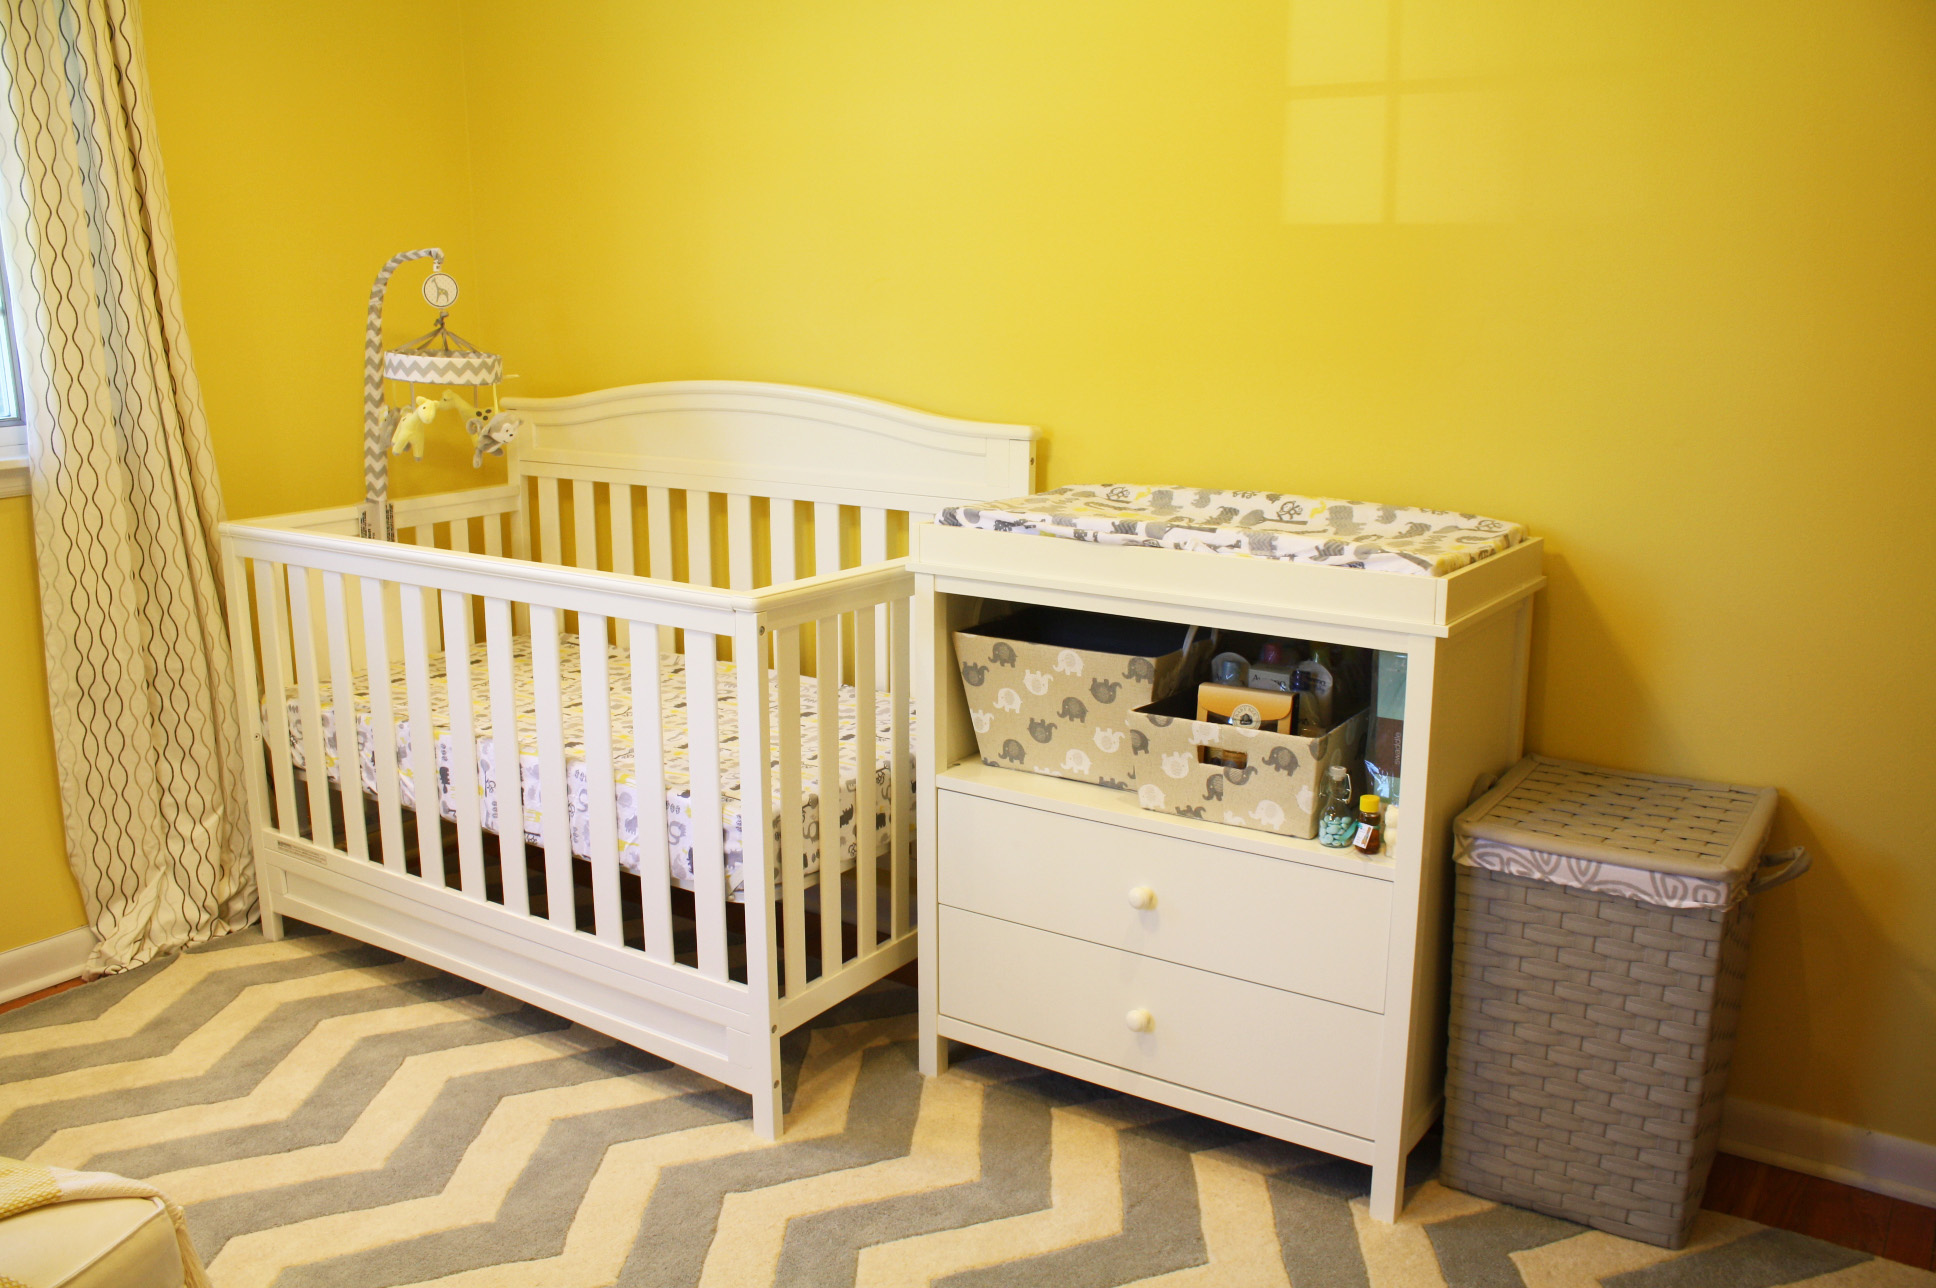
This is a 4-in-1 convertible crib, and after much research, we opted for a dresser with a detachable changing table. I felt it did more for the space aesthetically, and also just made more sense for long-term use. I especially loved the open space for easy access to a few baskets for creams, powders, and bath products. The hamper was another great find at home goods, since this little one will undoubtedly need his own load of laundry.

The biggest investment in this room was actually the rug, from Overstock. Why with all this furniture was an area rug the largest expense? While looks create an inviting space, safety is number one. As it turns out, synthetic fibers in rugs can end up shedding, making it easy for baby to stuff in his mouth, and also fumes can be produced when you vacuum. So to give myself some peace of mind, I went with a 100% wool rug from Safavieh.

Cards_Closet_Bookshelf_edited-1

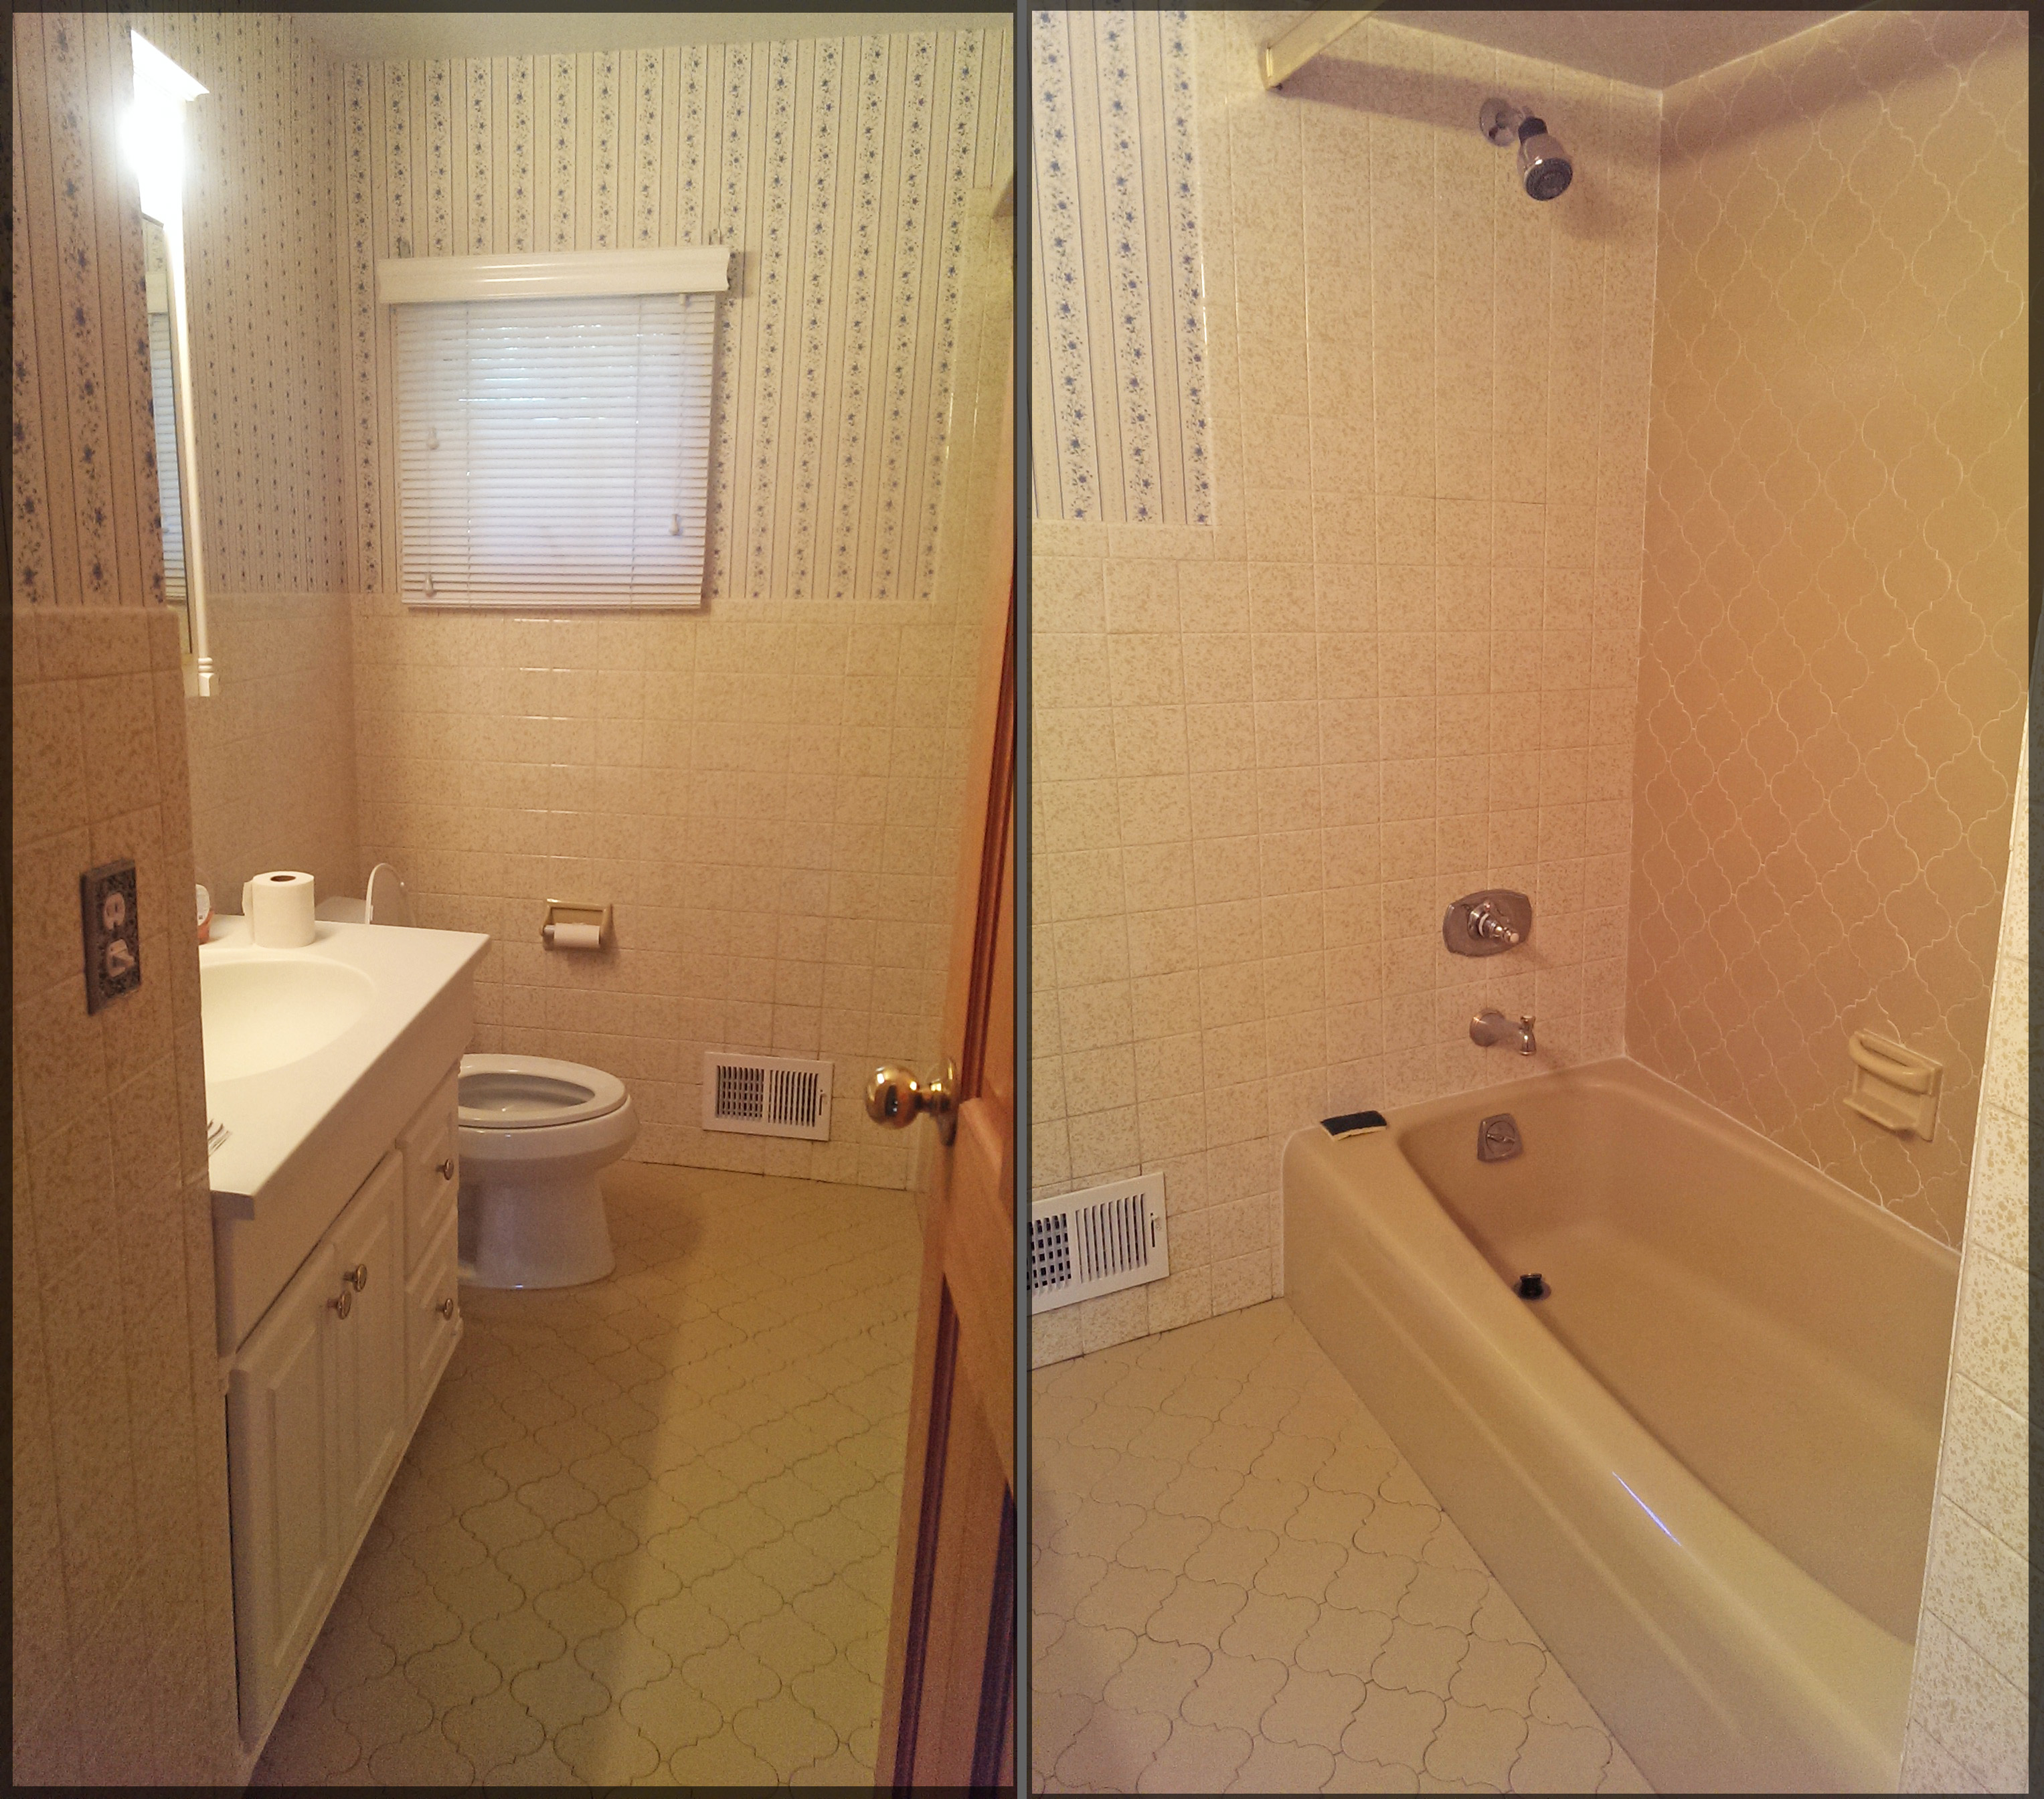
In a separate entry, I will actually go over the only renovation in this room, which was re-framing this closet from a single door to double bi-folds. It was musty, with carpet, and a diy wood organizer — none of which was safe for baby (or frankly, us!). But we are so in love with this closet now filled with everything, and probably more than, baby needs for the first year.

Lastly, I found this memo holder at my parents house sitting empty, and thought it was the perfect place to display all of the thoughtful cards we received for friends and family. I am always sad to store away beautiful cards into a box, and now I don’t have to. Plus, it adds a nice pop of color to this wall.

I know my posts have been few and far between, but keep an eye out as we start to move things around the house, letting me complete some of the less-than complete spaces. Thanks for reading!

Everything is a high/low project: Part Two

In case you missed part one, this is where I take some of my favorite pieces and show you how expensive taste doesn’t have to leave you with an empty wallet. As always, you don’t want to compromise quality, because the only thing worse than being pained by your credit card statement, is being pained by an item that breaks three months in because you wanted to save a few bucks.

Home Office

After

Low\\ Tabletops Free (Re-purposed, originally from Ikea) | Drawer Unit $80 @ Ikea

As mentioned in the original post, the home office was where we were going to try to cut some costs after a few splurges in the other spaces. But in the end, it reflected our style more than any other pieces we had considered. The biggest savings were that the tabletops were actually laminate tops i lightly sanded and painted over with white. We added the Alex from Ikea at $80 a piece, and voila! For $160, we had a brand new work space for two. It made the most sense after browsing our optoins, like this table:

High// Desk $899 @ West Elm

While a nice clean design, this desk from West Elm is $899, and still made of laminate. Even if I didn’t have the tabletops on hand, it would have only been about $60 per tabletop, putting me at $140 per desk. So you have to ask yourself, is it worth 6x the cost? Most likely not. Your furniture shouldn’t be a burden on your wallet (or on your conscience)!

Master Bedroom

NightstandDresserBed3

Low// Nightstand $107.99 @ Overstock.com | Lamp Base + Shade $27 @ Ikea | Dresser + Pulls $188 @ Ikea | Upholstered Bed Frame $639.99 @ Overstock.com

Another great way to keep design interesting is by mixing and matching. Know where to spend a little more, then save on pieces you know are pretty similar. If the piece is going to cheapen the whole design, it’s not money saved; it’s a loss on all of the other pieces. One bad piece can ruin an entire space, so never settle. It takes time and patience to finish a space. If you start to fill the space with pieces you don’t love, you’ll be annoyed when you have to spend again when you finally find that piece. Just wait – it will turn up.

High// Nightstand $254 @ West Elm

High// Lamp $269@ Ethan Allen

High// Dresser $1,099 @ Crate and Barrel

high// Upholstered Bed $1,849 @ Room & Board

Master Bedroom Low: $1,100

Master Bedroom HIgh: $3,996

MASTER BEDROOM SAVINGS: $2,896

Sometimes you can feel like you’re only buying furniture once in a blue moon, so it is worth the splurge. But wouldn’t it be great to have a beautifully furnished room and a vacation to say, Hawaii? Because that’s what you can do with all of those savings. Plus, if you get sick of the look a few years down the line, you shouldn’t have to feel guilty for wanting to change it up a little. Take the time to do your research and it will pay off – literally!

Simplicity is an acquired taste…

…Mankind, left free, instinctively complicates life. -Katharine Fullerton GerouldBed2

If there is one room in the house I insist on keeping clean and simple, it’s the master bedroom. There’s a reason why luxury hotels always insist on simple patterns and soft colors – it’s relaxing! So, why fill your own home with clutter and complication?

I unfortunately do not have photos of the before, but I can tell you it was pink, with a floral wallpaper border along the top part of every wall. Needless to say, it was not for keeps, and did nothing for the already small space. It’s a conservative 11×14 master bedroom, so much like other spaces in the house, I had to measure twice, because even an inch could mean saying goodbye to a crucial piece of furniture. There were windows on two walls, and a closet on the other, so that left us one wall for a king size bed and two nightstands. The recessed lighting was designed so we could highlight whatever piece we chose to hang over the headboard. We chose an upholstered platform bed, which allowed us to get the clean lines we needed for a small space, but also softening the space at the same time. I measured my leftover space and knew I would be restricted to an 18″ wide nightstand. Thanks to Overstock.com, both of these crucial items were an easy find, and at a fraction of the cost.

Nightstand

I paired the items with some simple glass table lamps and decorative frames from Ikea. A few quick 12×18 prints ready in an hour at Costco, and voila. The feature wall was complete. The rest of the room (which wasn’t much) would also have to focus on the essentials, like clothing storage.

Unfortunately, the 50s didn’t do anyone any favors and left us with a closet that was no bigger than the other rooms. Single door, and nothing special. But I was convinced and went in to measure – it was 7×3 feet –  yep, behind that single door was 7×3 feet. We could make this work. The closet just needed a makeover to let it have its full potential.

Closet

The closet was a little too messy to take interior photos, but essentially we had it re-framed for double bifold doors, gutted the inside to add a closet organizer, and wired it up for lighting. We couldn’t believe it was the same space, however, unfortunately, still not big enough for the two of us. But have no fear, Ikea is near:

Closet_Bench

I was torn between two options for a second closet – a floor-to-ceiling wardrobe to mimic the use of a full closet vs knocking down the wall into the closet of the next bedroom, which we could then keep as an office. But, as a Realtor, i was concerned of the need to eventually convert it back should we sell, since you need a closet to qualify for a bedroom. Plus, it was the larger of the two other bedrooms, which I would prefer not to lose to workspace. That’s when I came across this post while searching for Ikea hacks. It was gorgeous. Unfortunately, I did not have the woodworking ability or budget to complete it, but was happy with ceilings high enough to give it the full effect. I even had some spare space below the window to throw in a bench and pillow for a seating area.

Dresser

To give our closets room to “grow” we decided to use the wall space next to the closet to put a dresser, which would also double as a tv console. And yes, this dresser seems familiar; it’s because it is another piece from Ikea. We purchased it while staying in a temporary home, but I didn’t want it to be too obviously Ikea, so I dressed it up with some pulls from ::drum roll:: ikea. Nothing dresses up Ikea like more Ikea. I actually looked into other pulls, but these had the nice clean lines we needed to go with the contemporary feel

Bed3

This room didn’t take much – recessed lighting, wall paper border removal/fresh paint, closet rebuild. It came in well under $1000 and was well worth the investment. In my next post, I’ll be continuing the high-low project for pieces from my most recent posts. Thanks for reading!

P.S. I apologize for the hiatus – but I hope to be more on top of it in the weeks to come. I only have a few more rooms left in the house , and some are far from completed design wise, so you’ll be seeing some “inspiration” posts and answers to questions I’ve been getting. If you have any, please do not hesitate to send them my way. Thanks for reading!

Where the Magic Happens

Unlike the infamous MTV Cribs, by magic, I mean where inspiration and motivation become reality.

After

Our office was the easiest on the budget, but came at the expense of time-consuming planning. We re-purposed a lot of our furniture and didn’t even so much as change the paint on the walls. But it goes to show how much furniture can change a space and trick your brain into believing it’s bigger. This is the only space in our home where you will see 99% Ikea (all but the area rug), and the main reason for that is because Ikea’s modular designs are friendly toward small spaces. That said, the other reason is because it’s what we already had from our “compact” Manhattan studio, which coincidentally (and horrifyingly) had a living/dining area with the exact dimensions of this room.

Before

I couldn’t get the camera angle quite right at the time, but you get the idea. In this exact same space, the previous owner only managed a twin bed, nightstand, and single arm chair. They also used an area rug that mimicked the look of wall to wall carpet, completely shrinking the space. I used a smaller area rug from Safavieh placed in the center of the room, which tells your brain – “Wow, you have space for an area rug AND all this furniture?”

I spent a lot of time browsing and pinning “small offices for two” and the friendliest layout was a wall to wall desk. To my pleasant surprise, our once dining table and once workstation (both tabletops from Ikea) managed to total the exact length of the shorter wall. However, one was brown and one was birch, but that wasn’t anything a little light sanding and white paint couldn’t handle (Note: Laminate must be primed! Great tutorial here). We replaced a pair of legs from each table with the Alex, creating storage space and eliminating the chaos of our papers mixing altogether.

Shelving

A long debate was a file storage solution – open or closed? I knew we would have to go for some kind of wall/overhead unit. I also knew I wanted my books displayed, like a little trophy for every story completed, but there simply was not enough floor space to add a bookcase. There is a large double closet with perfect shelving for office supplies and such, but again – I wanted a display. These Lack floating wall shelves were the perfect compromise, and again, almost perfectly measured out to the length of the wall. I used magazine files to hold my active files and also add an interesting design element, breaking up the space.

Chaise

We even managed to put our over-sized chaise lounge in the corner (right under some of my books!) as a reading nook. Though, as you can see, Nemo seems to get more use out of it than either of us do. But with all of our recent snowstorms, it has been a nice little spot to cuddle up with some tea.

I do apologize for the overall bare walls in this room. We’ve been having trouble committing to anything, but I hope to have a follow-up post in the future with whatever we come up with. What we did manage to find was this glass cabinet door from the as-is section in Ikea for a whopping $3. It is perfect as a diy-white board, since dry-erase markers work just fine on glass.

Like I said, there weren’t many expenses – LACK wall shelves (4) $70. White Paint & Primer $20. ALEX drawers (2) $160. For $250, the results were more than a pleasant surprise. We now have a comfortable office space for two with more than enough storage space for both personal and work papers. While I have always advocated investing into your space with what you love, it doesn’t mean you shouldn’t love what you already have on hand. Get a measuring tape, maybe some paint, and get creative!

Connect with me @JennChanRealtor
  

It was so old, some of it was almost making a comeback.

I was even tempted to salvage some of it with epoxy, but made the wiser choice and impulse designed this while picking out tile:

After

(Sorry for the less-than-fancy showerhead/hose – we give Nemo showers in here, so function over fancy!)

Thanks to a contractor with honest opinions and a husband who saw my future of regret in short-term savings, we gutted this and said goodbye:

Before

I know. I know. What could I possibly want out of THAT? It was the moroccan trellis/lantern tile. After telling a contractor I loved everything about it, except the mustard yellow, he suggested I epoxy the back wall of the tub and floor, along with the original cast iron tub “since they don’t make them like they used to.” Between seeing the savings and knowing new tile of the same shape was beyond out-of-my-budget, i convinced myself it was a good idea. I told the contractor I ended up using and he said, “Listen, I’ll do it if you want, but if it doesn’t look good, don’t tell anyone this was my job.” That quickly dissolved my genius savings idea into doubt. I was still convinced I could pull it off and started planning.

As they were gutting all but the tub, floor and tub wall, we were out choosing tile for the other two walls of the tub. I went into panic and thought about the obscene cost it would be to rip it out and replace it should I hate it… and if that would even be an option. So I called and said, “I just picked out all new tile for everything, along with a new cast iron tub. It’s ready at contractor pick up. Gut it all.” He laughed and said good thing, because he had a surprise for when we got back. It turns out, the ceiling above the tub was lowered without a purpose, so in gutting the entire bath, we actually gained almost 2 feet of ceiling in the shower area (I guess people were shorter in the 50s?). The decision increased our budget significantly, as we now purchased more marble, floor tile, a cast iron tub from Kohler, and needed a full gut. But it was well worth it.

By the way, when you purchase a new tub, do not try to save money by opting for a material cheaper than cast iron. You do not want your tub to crack if you drop something on it, or even worse, stand on it. Just count that job into the cost of your “savings.”

Toilet

I never knew I could enjoy decorating an area by the toilet so much that I actually thought it looked pretty. Looks are best when they serve a purpose, so I chose to use some glass shelves from Ikea along with a few of their glass canisters to hold our cotton products. Since the top shelf is more to bring the eye up and draw attention to the crown moulding, I chose a few decorative items from TJ Maxx. The three pieces on the top shelf totaled a $20 investment and create visual interest, while adding some color to a small space. Bathroom decor shouldn’t be ignored because it is just a bathroom; it should get just as much attention as any room because it is YOUR bathroom!

Vanity

The only piece I did salvage was the vanity. Partially because there was nothing wrong with it and mostly because it was an irregular size and difficult to find an all white vanity. Somewhere down the line, I will replace the hardware with something in full chrome to match the rest of the hardware in the space, but for now it’s sitting on the to-do list. An important tip to create a seamless design is making sure all hardware has the same finish. You can get away with differences in handle shape, etc, but the finish is tough to miss.

Since it wasn’t a large space, I paired the vanity with a frameless mirror cabinet for extra storage, which had the bonus of soft-closing doors. This is a nice perk to have when morning rushes often end up in slammed cabinets, which could end up in a very expensive crack in the mirror.

Details

As always, it’s all in the details. Along with the space above the toilet, I paid careful attention to where else I could create visual interest. The light fixture, as it did in the dining room, was cause for debate. When I saw this fixture at (surprise, surprise) Home Depot, I knew it was the one, but hated the idea of again, buying the most expensive fixture at the store at $100. So of course, we bought a couple cheap-o $60 or $70 fixtures instead thinking any 3-light fixture in a chrome finish would do the job. When we took it out of the box, we realized how ridiculous it was to try and save $40 on a renovation that was costing us thousands of dollars. We switched it, loved it, and even our contractor wanted to know where we bought it.

Since we opted not to carry the marble into our flooring, I used a mixed glass and marble tile mosaic to be used in both the tub walls and the flooring. I created a 3-feet mosaic on the floor following the direction of the tile lengthwise, to create depth in the space. Always lay tile following the length of the space to make it seem longer. Our brains play tricks anyway, so might as well use it to your advantage!

I chose a simple curved shower rod from Moen and complimented it with a patterned shower curtain and these adorable knotted curtain rings from TJMaxx. Make sure your curtain rings are rustproof, since rust on your shower curtain rings can scratch up the bar.

Our original budget, when I was salvaging all of that lovely tile, was $3,500. After the decision to upgrade, I increased the budget to $5,000. Our total was aroudn $5,500. This comes out to a 10% overage, which is more than reasonable for significant material upgrades and for what the design did for the space. In most rooms, a coat of paint will do the trick, but a bathroom is a long term investment, so choose wisely and as always, be happy with your decision!

If you aren’t already, connect with me @JennChanRealtor


Everything is a high/low project: Part One

One of my favorite shows on HGTV was (is? if it’s still on and I just never come across it) Sabrina Soto’s high/low project. This is my general rule for all home decor purchases, so it was nice to see HGTV highlight the reality that we can’t all spend $1000 on an end table. It does take a little more work, thus the term “bargain hunting”, but when you calculate your savings, you’ll learn it was well worth it. The other piece of it is to not sacrifice quality as a result. For this, I follow two rules: 1. When you have a choice, choose real wood 2. Read reviews and ignore the minority reviewer(s) who doesn’t know how to put furniture together.

Living Room

low project

low// Morroccan stool $39.99 @ Home Goods | upholstered chairs (set of 2) $243.99 @ Overstock.com | moroccan trellis rug (gold) $242.24 @ Overstock.com | Lamp $39.99 @ TJ Maxx | nesting tables $129.99 @ Overstock.com

As you can see, Overstock is a great resource for getting look-a-likes on the cheap. Occasionally, they’re not even copycats since a few items in the room are Safavieh and Ethan Allen pieces. On a regular (almost-weekly) basis, Overstock sends their customers 10%-15% off coupons. They also offer 5% back for club O members, which allows customers to use a trial but otherwise pays for itself after a few purchases. However, their prices also do go up and down and items do disappear, so keep items on your wishlist or save for later and keep an eye on it!

high// Bubbles Ceramic Side Table $103 @ West Elm

high// Hayes Tufted Chair $399 (each) @ Pottery Barn

high// Fretwork Dhurrie Rug  $859 @ Ethan Allen

high// Windham Table Lamp  $599 @ Ethan Allen

high/ Box Frame Nesting Table $239 @ West Elm

Living Room High: $2200 | Living Room Low: $700

Dining Room 

After

low// Pendant Lamp  $149.99 @ Home Depot | Nailhead Dining Chairs (set of 2) $183.89 @ Overstock.com | Beveled Mirror $79.99 @ Home Goods | Trellis Curtains (Set of 2 Panels) $19.99 | Saddle Stools (Set of 2) $84.63 @ Overstock.com

The funny thing about bargain hunting is you often lose sight of how much you’re spending, because everything around you is a bargain. For example, we were so reluctant to buy this lamp because it was basically the most expensive lamp at the store. But the thing we forgot was that it was still a fraction of what something similar may cost at a lighting store and was still serving the purpose – providing light! We almost went with a lamp that was more than half the price at $69.99, but it was in a burlap and missing the stripe, which in hindsight would have darkened the room significantly. So i’ll repeat it again, it’s an investment into your everyday needs! Even after realizing the value in it, we still found ourselves in the same place with other lighting purchases.

high// Small Meurice Pendant Lamp $550 @ Jonathan Adler

high// Hudson Camelback Upholstered Side Chair $229 @ Restoration Hardware

high// Astor Mirror $299 @ Pottery Barn

high// Kendra Trellis Drape $84 (per panel) @ Pottery Barn

high// Tibetan Bar Stool $99 (each) @ Pottery Barn

Dining Room High: $1680 | Dining Room Low: $510

It is a huge breath of fresh air to see the savings and know that having a photo-ready room doesn’t mean you will have to sit in your gorgeous new dining room living off of bread and water for the next year. I was lucky to come across these finds in the early part of my decorating, but don’t be afraid to take your time. Don’t settle for pieces you’re not in love with. Also, keep in mind the best part about places like TJ Maxx/Home Goods/Marshalls and Overstock are their great return policies. You can pretty much return anything for store credit, so don’t be afraid to buy it to test it out. For a while, I had an entire closet of “maybe” items. I eventually found other places for many of them, but for the rest I’ll quote the blind side and say – if you don’t absolutely love it in the store, you won’t “wear” it.

Happy hunting, readers!

Recipe for a Happy Home

Take love and loyalty, mix it thoroughly with faith. Blend it with tenderness, kindness and understanding. Add friendship and hope. Sprinkle abundantly with laughter. Bake it with sunshine. Serve generous helpings daily. – Unknown
After
The kitchen was going to be the most important room for me. So when I saw what I had to work with, I knew there was going to be a lot of designing to be done. (*Updated 2.4.15 with a better photo of the wall we took down, but after the seller moved out)
Before 2
Needless to say, out came the measuring tape. Even after measuring, I wasn’t sure what I could do with the space, so I knew just visualizing and having the measurements wasn’t going to cut it. I needed to see this on paper. The wall needed to come down,  I didn’t need an eat in kitchen, but I did need prep & storage space – a lot of it. With concerns of what taking down the entire wall would do to the floors (and my budget) I compromised with this brainstorm doodle:
Some people are really intimidated by the idea of building an island, but in reality it is just a bunch of base cabinets with your choice of countertop. I knew I could salvage the rest of the cabinet s- they were sold wood, in good shape, and even had sliding shelves in all of them. Knowing matching the cabinet style and paint would mean I had to go custom, I opted for the fortunately-in-style trend of a contrasting color for my island. Which also led me to the option of Ikea kitchen cabinets. I know many people turn their nose at this thought, but here’s the truth about custom cabinets: Even custom cabinets are modular. In this modern culture of the internet and renovating, you can pretty much get a modular cabinet in any size. Yes, Ikea may not be 100% wood, but the doors are solid wood, and the rest is incredibly durable. I looked into a lot of different modular cabinet brands, and Ikea really beat everyone in reviews, price, and time. We picked them up at the store and had the crew put them together the next day.
As a Realtor in North Jersey, I see these cabinets widely used in luxury buildings throughout Jersey City and Hoboken, especially to enhance the otherwise small spaces.  They typically hide behind granite and hardware from somewhere else- this is the secret to dressing up these budget friendly cabinets – buy your finishes elsewhere. In any given area, you can find a granite slab distributor who will cut, deliver, and install. They will even give you sample pieces to help in your design and it will beat the quality of any big box store who outsources to a third party, which means you are paying twice the markup. The distributors also have leftover slabs from special orders which means, if you’re lucky, you get to pay $30/sq ft for what that high end designer needed at $50/sq ft.
Stove Fridge
As mentioned in the dining room post from last week, seeing messy prep work from the dining table is a pet peeve of mine. WIth this in mind, I designed the second tier to not only hide the mess, but perfectly cover the small appliances when you are looking in. (If you are using stools, still keep in mind there is a standard clearance between stool top to countertop!) Originally, I had planned to break up the tiers with the same backsplash tile, but there was not much granite in that strip, so it was not worth the minimal cost savings in the long run. I managed to find these simple pulls that were nearly identical to the original cabinets, creating a seamless feel.
Though it was a large (unplanned) expense, we upgraded all the appliances to stainless steel, which almost instantly modernizes a kitchen. An important tip when shopping for appliances is to know that big box stores will price match. In fact, Home Depot has a meet it and beat it policy for major competitors- which basically means if you see it at Lowe’s or Sears for cheaper, they will match it and give you 10% off on top. Thanks to labor day sales and a few calls to Customer Service, our dishwasher was essentially free.
Cabinets Sink
One of the most important realities during a renovation is to be realistic about what you can salvage and being ready for the difficulties that choice may bring. I will talk more about this in my main bath post, but sometimes opting to salvage can cost you more in the long run. We were fortunate enough that the only problem with the cabinets were that they were too low, so we actually had them raised 4 inches to meet standards. We also chose to keep the faucet since it had everything we needed.. Also, it’s not difficult to change out sink hardware as long as you use standard dimensions.
Nespresso
In design, you also have to weigh the benefits of customization; meaning, will what is custom to me work for someone else? As tempting as it is to design to your taste, you may pay the price for it if you ever decide to sell and a buyer wants you to pay for removing it. I have always been one for a simple background, so I chose a basic matte subway tile in an almond. Nothing offensive about beige, and there’s room to add color in other ways, like small appliances and kitchen storage. In fact, I have gotten more compliments on this simple backsplash than I have the granite!
Nemo
With that said, you should not sacrifice your everyday conveniences worrying about that dollar floating somewhere in the future. The only guarantee you have is the happiness of waking up in a home you love today. Like I’ve said before, a home means something for everyone, so I had Nemo in mind for almost every room. I added pull out cabinets on both sides, which allowed me to create this doggy corner for his food and water bowls along with food and snack storage. It also created a deeper countertop, which means a win-win.
For this kitchen overhaul, we took down half a wall, built a two tier breakfast bar/island, replaced countertops with granite, replaced sink and all appliances, ran the waterlines to accommodate the new fridge with water dispenser, replaced the tile backsplash, moved the cabinets further up the wall, installed an exhaust, and bough tall new appliances. The total budget was $6000 for the kitchen AND dining room. With the decision to replace all appliances, as opposed to only the fridge and dishwasher, we came in at about $5000 for labor/materials, plus about $2500 toward appliances. This was over the typical 20% overage I plan for in a budget, BUT had we stuck with our original plans we would have been on budget at the expense of not being as happy with the results.
Fortunately, we took the leap of faith and now not only carry all ingredients for a happy home, but have plenty of room to enjoy recipes of all kinds. Thanks for reading and check back in next week for my post on our main bath!
P.S. I managed to sell some of our old appliances on Craigslist, which also offset costs of new appliances significantly.

Following The Golden Rule: Eat, drink, and be merry!

Wait, or is it something about how to treat others? Oh well, I say treat others to food, drinks, and happiness!

After

In our home search, one of the most important spaces to me was the dining room, which came in just behind the kitchen. It’s not to say i’m some gourmet chef, but I do love cooking and entertaining. I also needed a space to finally display all the serveware from our wedding registry that was collecting dust in my parents’ attic. Measurements were key – I was looking to seat 6-8 people and ideally a sideboard. When I saw what I had to work with, I took out the measuring tape, because while renovation can open up many doors, they certainly do come with limits – like the walls.

Before

After taking measurements, I realized it was the furniture that was limiting my perception of space. It was not a large space, but it was big enough. Still, if I wanted the space I was looking for, I would have to take a wall down–well, at least half of one. So, I took down half the wall between the kitchen and dining room, designing a two-tier island (next week’s post!) creating a bar-height counter to replace the need for a sideboard. This also solved the problem of seeing a mess on the kitchen counter once dinner is served (one of my biggest pet peeves!).

We painted throughout, added crown moulding and used the already present chair rail to incorporate wainscoting throughout the room. The biggest surprise in this room was that the chair rail and floor moulding behind the monstrous china cabinet was actually missing, which is somewhat common for homes of this age since china cabinets were in style. To save cost, I went from store to store trying to match the exact piece. It took some work and even several kind strangers’ help to finally find the missing piece, but for $7 my problem was solved. The renovation in this room was a minimal cost, since it was mostly bundled with the kitchen, so I’ll share it with next week’s post.

Details 2

I designed this space around a thick, contemporary black wood table. Fortunately, the in-laws also had this treasure in their collection of stored items. I chose armless upholstered chairs with nailhead accents I found on Overstock, to soften up the heavy dark wood and fit comfortably in the less-than-large space. In the same order, I added a pair of saddle seat stools to sit under the bar for extra seating, but also to bring more black wood into the space. As much as I would have loved to have an upholstered high back bar chair, it was too large for the space, which is a good reminder to always measure and be honest about what will work for your space. Sometimes less is more, sometimes more is more – you just have to be the judge of that!

In all the fun of decorating, lighting fixtures can often get left behind. Believe it or not, Home Depot has a great selection from traditional to modern. It may not be extensive, but there is something for everyone and is incredibly budget-friendly. Mirrors are also a great way to add light to a room and open up a space. This gorgeous mirror was a steal at Home Goods at just $80, and helped create the same effect as a window. I chose these lattice curtains at TJ Maxx to add pattern to what could be a very dark gray space. With any color choice, it’s important to know how to complement with other colors and patterns so it doesn’t take over the space.

Details

All in all, this room involved a lot of risks. I literally had walls torn down to create it, and I could not be happier with the results. I now have a comfortable, yet luxurious, feeling space not only to entertain, but to serve dinner on a daily basis. It also encourages me to cook more and eat out less, which is just another step in healthy, happy living. This was the greatest lesson in renovating: The investment you make is not only about getting a return on your money, but the return of happiness you get in waking up in a space you love.

Leave all that is bad in 2014. Bring all that is good into 2015…

After

…even if that includes the christmas tree. Just kidding! That’s coming down tonight.

It’s the time of year again – new year, new you. This past year, I embarked on a journey I’ve been dreaming of through many a Pinterest board and hours of HGTV: remodeling. Now I get to appreciate the results of my design and hard work; most importantly, share it with all of you. The miracle of a fresh coat of paint can only be likened to waking up on New Year’s day, refreshed and ready for new memories.

For months, I vigorously showed up at every 3 bedroom/2 bath that came on the market. As a Realtor, I reminded myself of the emotional roller coaster I often remind buyers of. But sure enough, the emotions still got to me, especially after losing a bidding war. Like many great things in life, as I was beginning to believe it was hopeless, I walked into this modest split level home, where a nice woman answered the door, sharing with me that she had 37 years of memories in this very living room.

before

It wasn’t much at first sight – definitely not love – but I knew then it could become the very home my husband and I would continue our lives together, as long as we could turn it into our own. When he first saw it, he grew nervous, recalling the renovation nightmares we’d seen on television. But something about the house felt right, and like with any important decision, you can’t deny your gut.

So we set out with a $20,000 budget and 3-week timeline to finish all of our interior renovations (not including decor). We found a labor-only crew, where we supplied the materials, and got to work. I spent a lot of time measuring, sketching plans, and studying paint swatches. The living room required the least renovations, but the most attention, in terms of decor. Renovations included a fresh coat of paint, crown moulding, and recessed lighting. Because the majority of these costs were bundled with other work throughout the house, it came in under $1,000. From there, it was just about the details.

Details

Because we didn’t have much furniture from our small space before, I spent a lot of time adding and removing furniture to my wishlist on overstock.com and driving back and forth between Home Goods, TJ Maxx and Marshalls. My in-laws also came in handy with some items they’ve collected in storage over the year. We were able to repurpose a lightly used (free) couch from them, by adding colorful throw pillows that came in under $150 at TJ Maxx. I also managed to save on the artwork above the sofa thanks to ikea’s budget-friendly frames and this creative pin.

Chairs Table

For days, I had oversized packages showing up outside my garage, including all of the tables and chairs. It even required some returns. Let me just say re-packing an 8×10 ft area rug, then dropping it off at FedEx was a several hour job in itself…for TWO of us!

Toys

The most important thing about making this living room ours was to make sure there was something for everyone, so how could I forget this little guy, Nemo. I needed to give him access to his toys without letting the house be over run by this 13-pound pooch, so I put them in a small canvas basket to hide behind this moroccan stool I had my eye on at Home Goods – plus, I finally had an excuse to buy it!

We ended up completing the interior renovation slightly over budget, but within the estimated time frame. It was stressful at times, and we did encounter a few speed bumps, but it has been one of the most rewarding experiences. On a (semi) weekly basis, I will be posting more features from our renovation, so I hope you can enjoy the results as much as I have. Happy new year, everyone – Wishing you all new memories this 2015!

You can also connect with me @JennChanRealtor: